What you need:
A. PSP X2 (others should work with some minor changes) You can get a trial version HERE
B. AV Bros Page Curl 2.2. You can get a trial version HERE
C. Netting 02 Texture
D. Eye Candy 5 Impact: Bevel Plugin. You can get a trial version HERE. My Page Curl Presets.
Supplies HERE
(Link updated 1/27/13, sorry for the inconvenience)
Terms of Use: Personal or *Commercial is OK.
*Tutorial, premade images and Presets remain copyright ShadeDeZines. You may use your results however you wish.
A. PSP X2 (others should work with some minor changes) You can get a trial version HERE
B. AV Bros Page Curl 2.2. You can get a trial version HERE
C. Netting 02 Texture
D. Eye Candy 5 Impact: Bevel Plugin. You can get a trial version HERE. My Page Curl Presets.
Supplies HERE
(Link updated 1/27/13, sorry for the inconvenience)
Terms of Use: Personal or *Commercial is OK.
*Tutorial, premade images and Presets remain copyright ShadeDeZines. You may use your results however you wish.
*You may use my presets for your projects PU or CU, but I retain creator credit for them. Meaning, you cannot give them away, sell them in any form what-so-ever. If someone wants them send them to my tutorial page to get the supplies for themselves. It took me some time to get these settings, please respect that. Thanks. Leave file names intact. Do not upload my Tutorial to any other site without my written permission. Do not claim as your own. If you are a group owner and would like to use my tutorial you may provide a link to my tutorial page/blog, but please don’t upload to your site unless I have given you permission to do so.
Lets get started :)
Lets get started :)
1. New Image > 900 x 900 > 300 ppi > Raster > Transparent.
2. Flood Fill the image to make it easier to see your mesh. You can use what ever
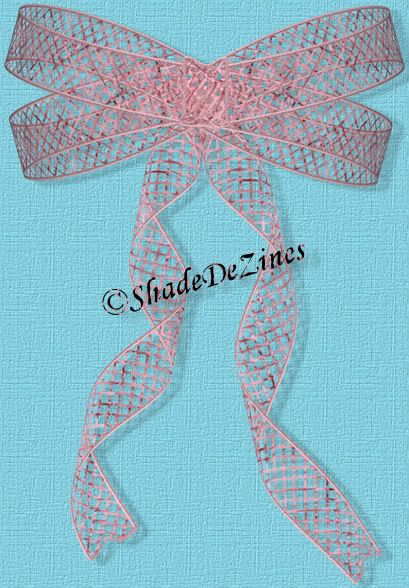
color/pattern/gradient you want for the bow. I am doing my example in a pink pattern. You will see my other examples below.
color/pattern/gradient you want for the bow. I am doing my example in a pink pattern. You will see my other examples below.
3. Click the Fill palette to open the Material Properties window. Place a checkmark in the box
next to Texture. Click the down arrow and search for and click on the "Netting02" texture.
Adjust your angle/scale to your desired settings.
Settings for the texture:
Angle: 0
Scale: 65.
next to Texture. Click the down arrow and search for and click on the "Netting02" texture.
Adjust your angle/scale to your desired settings.
Settings for the texture:
Angle: 0
Scale: 65.
4. Make sure your Foreground is set to Null.
5. New Layer
6. Activate your Selection Tool. Selection Type: Rectangle > Mode: Replace > Feather: 0 > Anti-
alias checked. Draw out a Horizontal Rectangle around 50 - 75 x 700 - 800 pixels. Turn on your Rulers if you haven't. View: Rulers. Right-click inside the selection hold and drag it to the center of the image.
alias checked. Draw out a Horizontal Rectangle around 50 - 75 x 700 - 800 pixels. Turn on your Rulers if you haven't. View: Rulers. Right-click inside the selection hold and drag it to the center of the image.
7. Flood Fill with Netting02 Texture.
8. Selections > Modify > Select Selection Borders:
Settings: Outside
Anti-alias: Checked
Border Width: 4
Settings: Outside
Anti-alias: Checked
Border Width: 4
9. Flood fill with desired color. Preferably a matching/complimenting color.
10. Add a texture matching the texture of your netting if you used a pattern with texture.
11. Add a bevel using my Eye Candy Impact 5 preset, or one comparable with PSP's native
Bevel.
Bevel.
12. Deselect: Selections > Select None. You should have something like this:

13. Duplicate the mesh layer: Right-click on the mesh in the Layer Palette and select Duplicate.
Highlight and name the bottom one Backup. Hide it for later.
14. Open Page Curl 2.2. Reset it to Default. Use the provided preset titled:
SD_MeshBowLoop.avcps. Move the loop to the top middle left. Duplicate the loop and Mirror. Position them next to each other.
SD_MeshBowLoop.avcps. Move the loop to the top middle left. Duplicate the loop and Mirror. Position them next to each other.
15. Highlight the Backup layer and duplicate it again. Turn the layer on if you haven't already :)
16. Image > Free Rotate > Left > 90 Degrees. Both layer boxes UNchecked. OK. Move it down
so all of it is inside the image canvas.
so all of it is inside the image canvas.
17. Effects > Plugins > Page Curl 2.2. Reset settings to Default. Click on Main > Load Settings
(Absolute) > Locate and click on Preset: SD_MeshBowRightRibbon.avcps. Click Open.
(Absolute) > Locate and click on Preset: SD_MeshBowRightRibbon.avcps. Click Open.
18. Repeat step 15.
19. Effects > Plugins > Page Curl 2.2 > Main > Load Settings (Absolute) > Locate and click on
Preset: SD_MeshBowLeftRibbon.avcps. Move it over into place.
Preset: SD_MeshBowLeftRibbon.avcps. Move it over into place.
20. We're ready for a center. You can use a brad or make a center. But lets just make a quick one.
21. New Layer. Move it to the top.
22. Selection tool: Type: Rectangle, Mode: Replace, Feather: 0, Anti-alias: Checked.
23. Draw a Vertical Rectangle just wide enough to cover the section where the bow loops meet
and long enough to cover the bottom of the loops.
and long enough to cover the bottom of the loops.
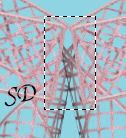
24. Flood Fill with the Mesh Texture. Click to Fill several times. This will make it look fuller and
not so transparent and will help to make it look like it is on top and hiding the lines below.
not so transparent and will help to make it look like it is on top and hiding the lines below.
25. Repeat Steps 8, 9, 10, and 11.
26. Select None
27. Duplicate this layer > Name it backup. Hide the bottom layer.
28. Activate the Warp Brush or you can use the Warp Mesh tool instead. I am using the warp
brush. Gently shape it as needed for the center section of bow. When satisfied, click Apply.
***I have found no perfect science to keep the edges from getting dark using either of these
methods. What I did was use my lasso tool and selected around and removed the black area.
This is a tough method when using mesh because it has so many open areas within it. If you
don't like the results you can always use a brad like I did in one of my other previews below :))
OK ... you can either stop now and merge your layers Visible, or we can duplicate the bows for
another look.
29. Move to a loop layer, Duplicate > Flip and move up into place. When happy with its placement move the layer to the bottom so it is behind the ribbons.
brush. Gently shape it as needed for the center section of bow. When satisfied, click Apply.
***I have found no perfect science to keep the edges from getting dark using either of these
methods. What I did was use my lasso tool and selected around and removed the black area.
This is a tough method when using mesh because it has so many open areas within it. If you
don't like the results you can always use a brad like I did in one of my other previews below :))
OK ... you can either stop now and merge your layers Visible, or we can duplicate the bows for
another look.
29. Move to a loop layer, Duplicate > Flip and move up into place. When happy with its placement move the layer to the bottom so it is behind the ribbons.
30. Repeat for the other side.
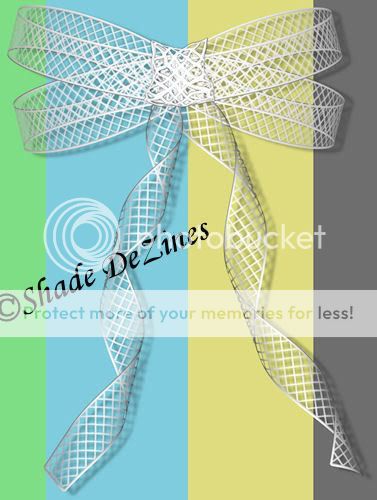
ALL DONE !!! Either Save the Backup layers to New Images for later use, or Delete them. Delete the background layer > Merge Visible > Save as a .PNG.
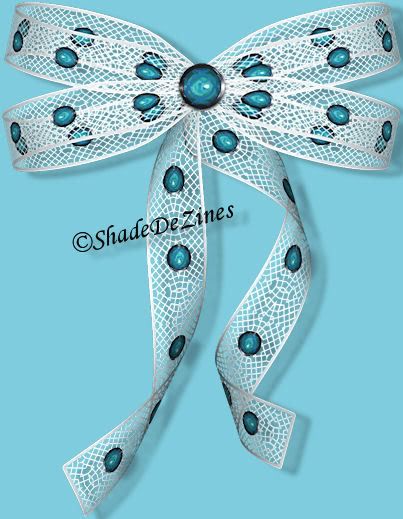
Some Examples :)
ALL DONE !!! Either Save the Backup layers to New Images for later use, or Delete them. Delete the background layer > Merge Visible > Save as a .PNG.
Some Examples :)